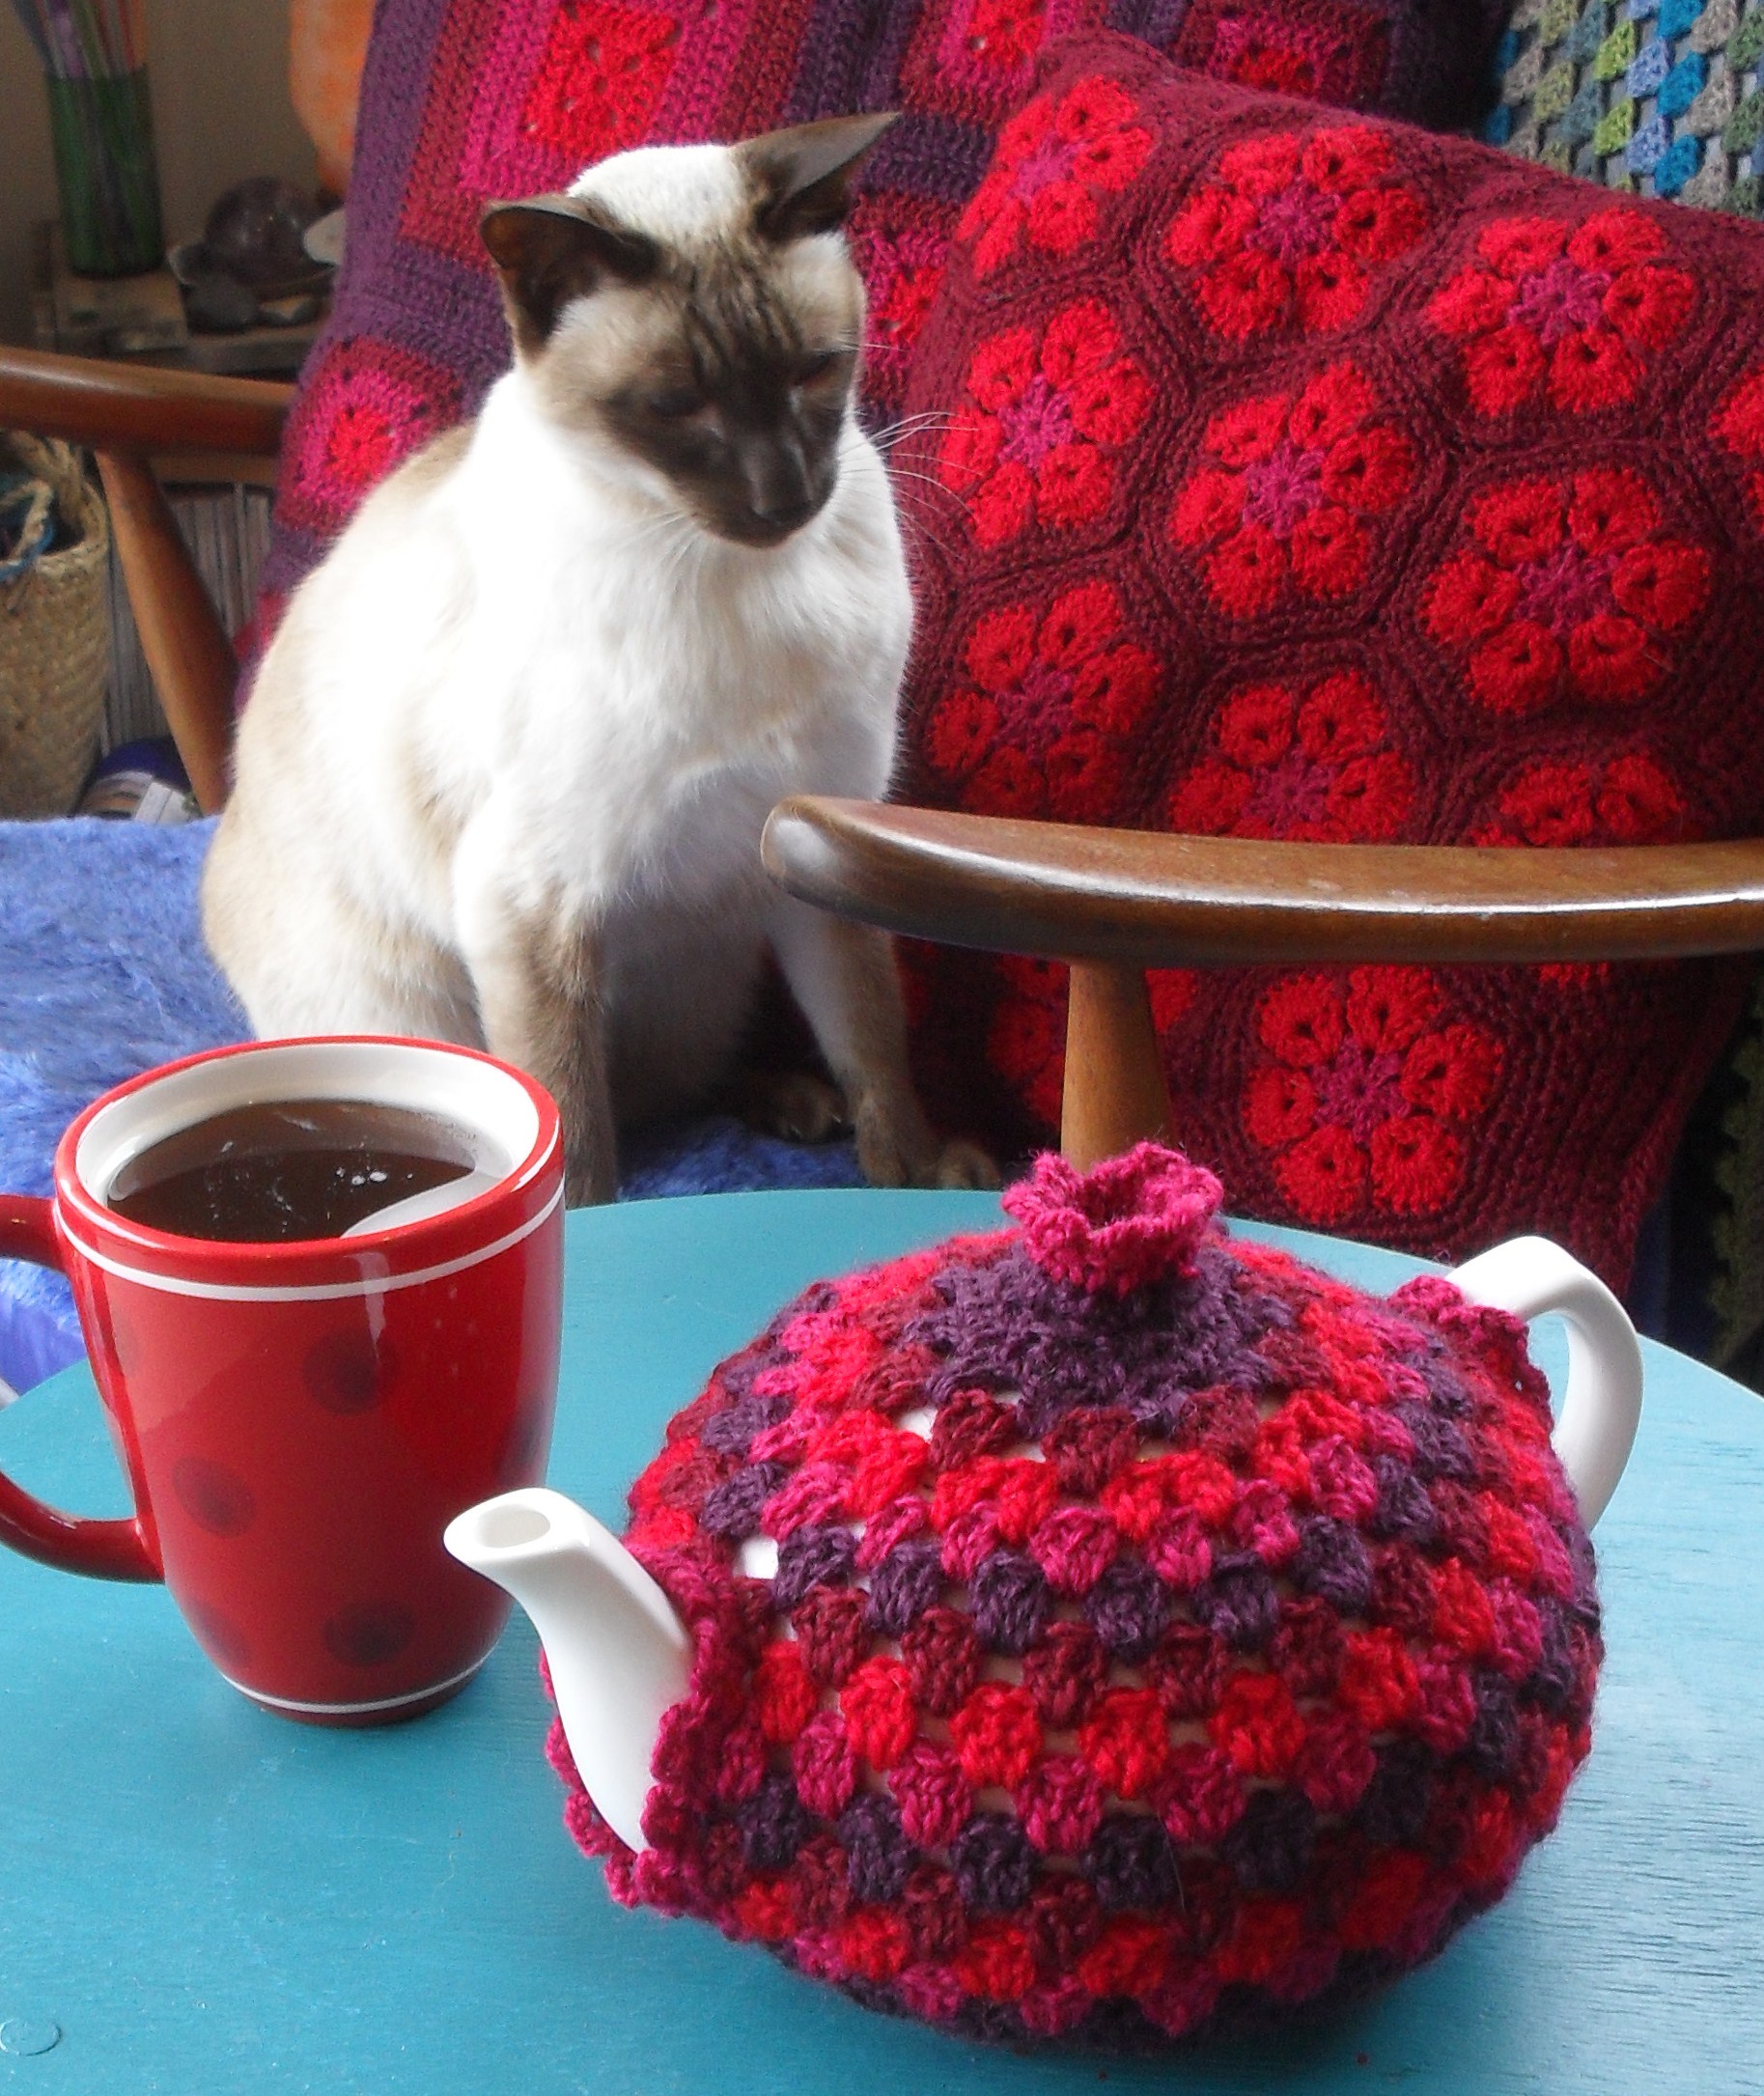
Hellooooo!!!!!
*WOW* is all I can say! *THANK YOU* for the overwhelmingly positive response about the Granny tea cozy! I felt so special when I sat down with my morning coffee to read my comments, you all say such lovely and kind things, it makes me feel quite joyful!
Many people were asking me to do a tutorial, so of course I will for you lovelies! How can I say no to such a wonderful and kind group of people really! In fact, it was brilliant timing because I have the day off today, (they’re a rarity at the moment!!!) so this morning, I got hooking, and clicking, and snipping and most importantly, scribbling down the pattern, and here it is…. it turns out that the second one was a lot easier, and the kinks have been sorted, so this is a relatively easy pattern with no random stitches added here and there to force it to fit!
*whispers* “I like this one better than the first one!” he he he
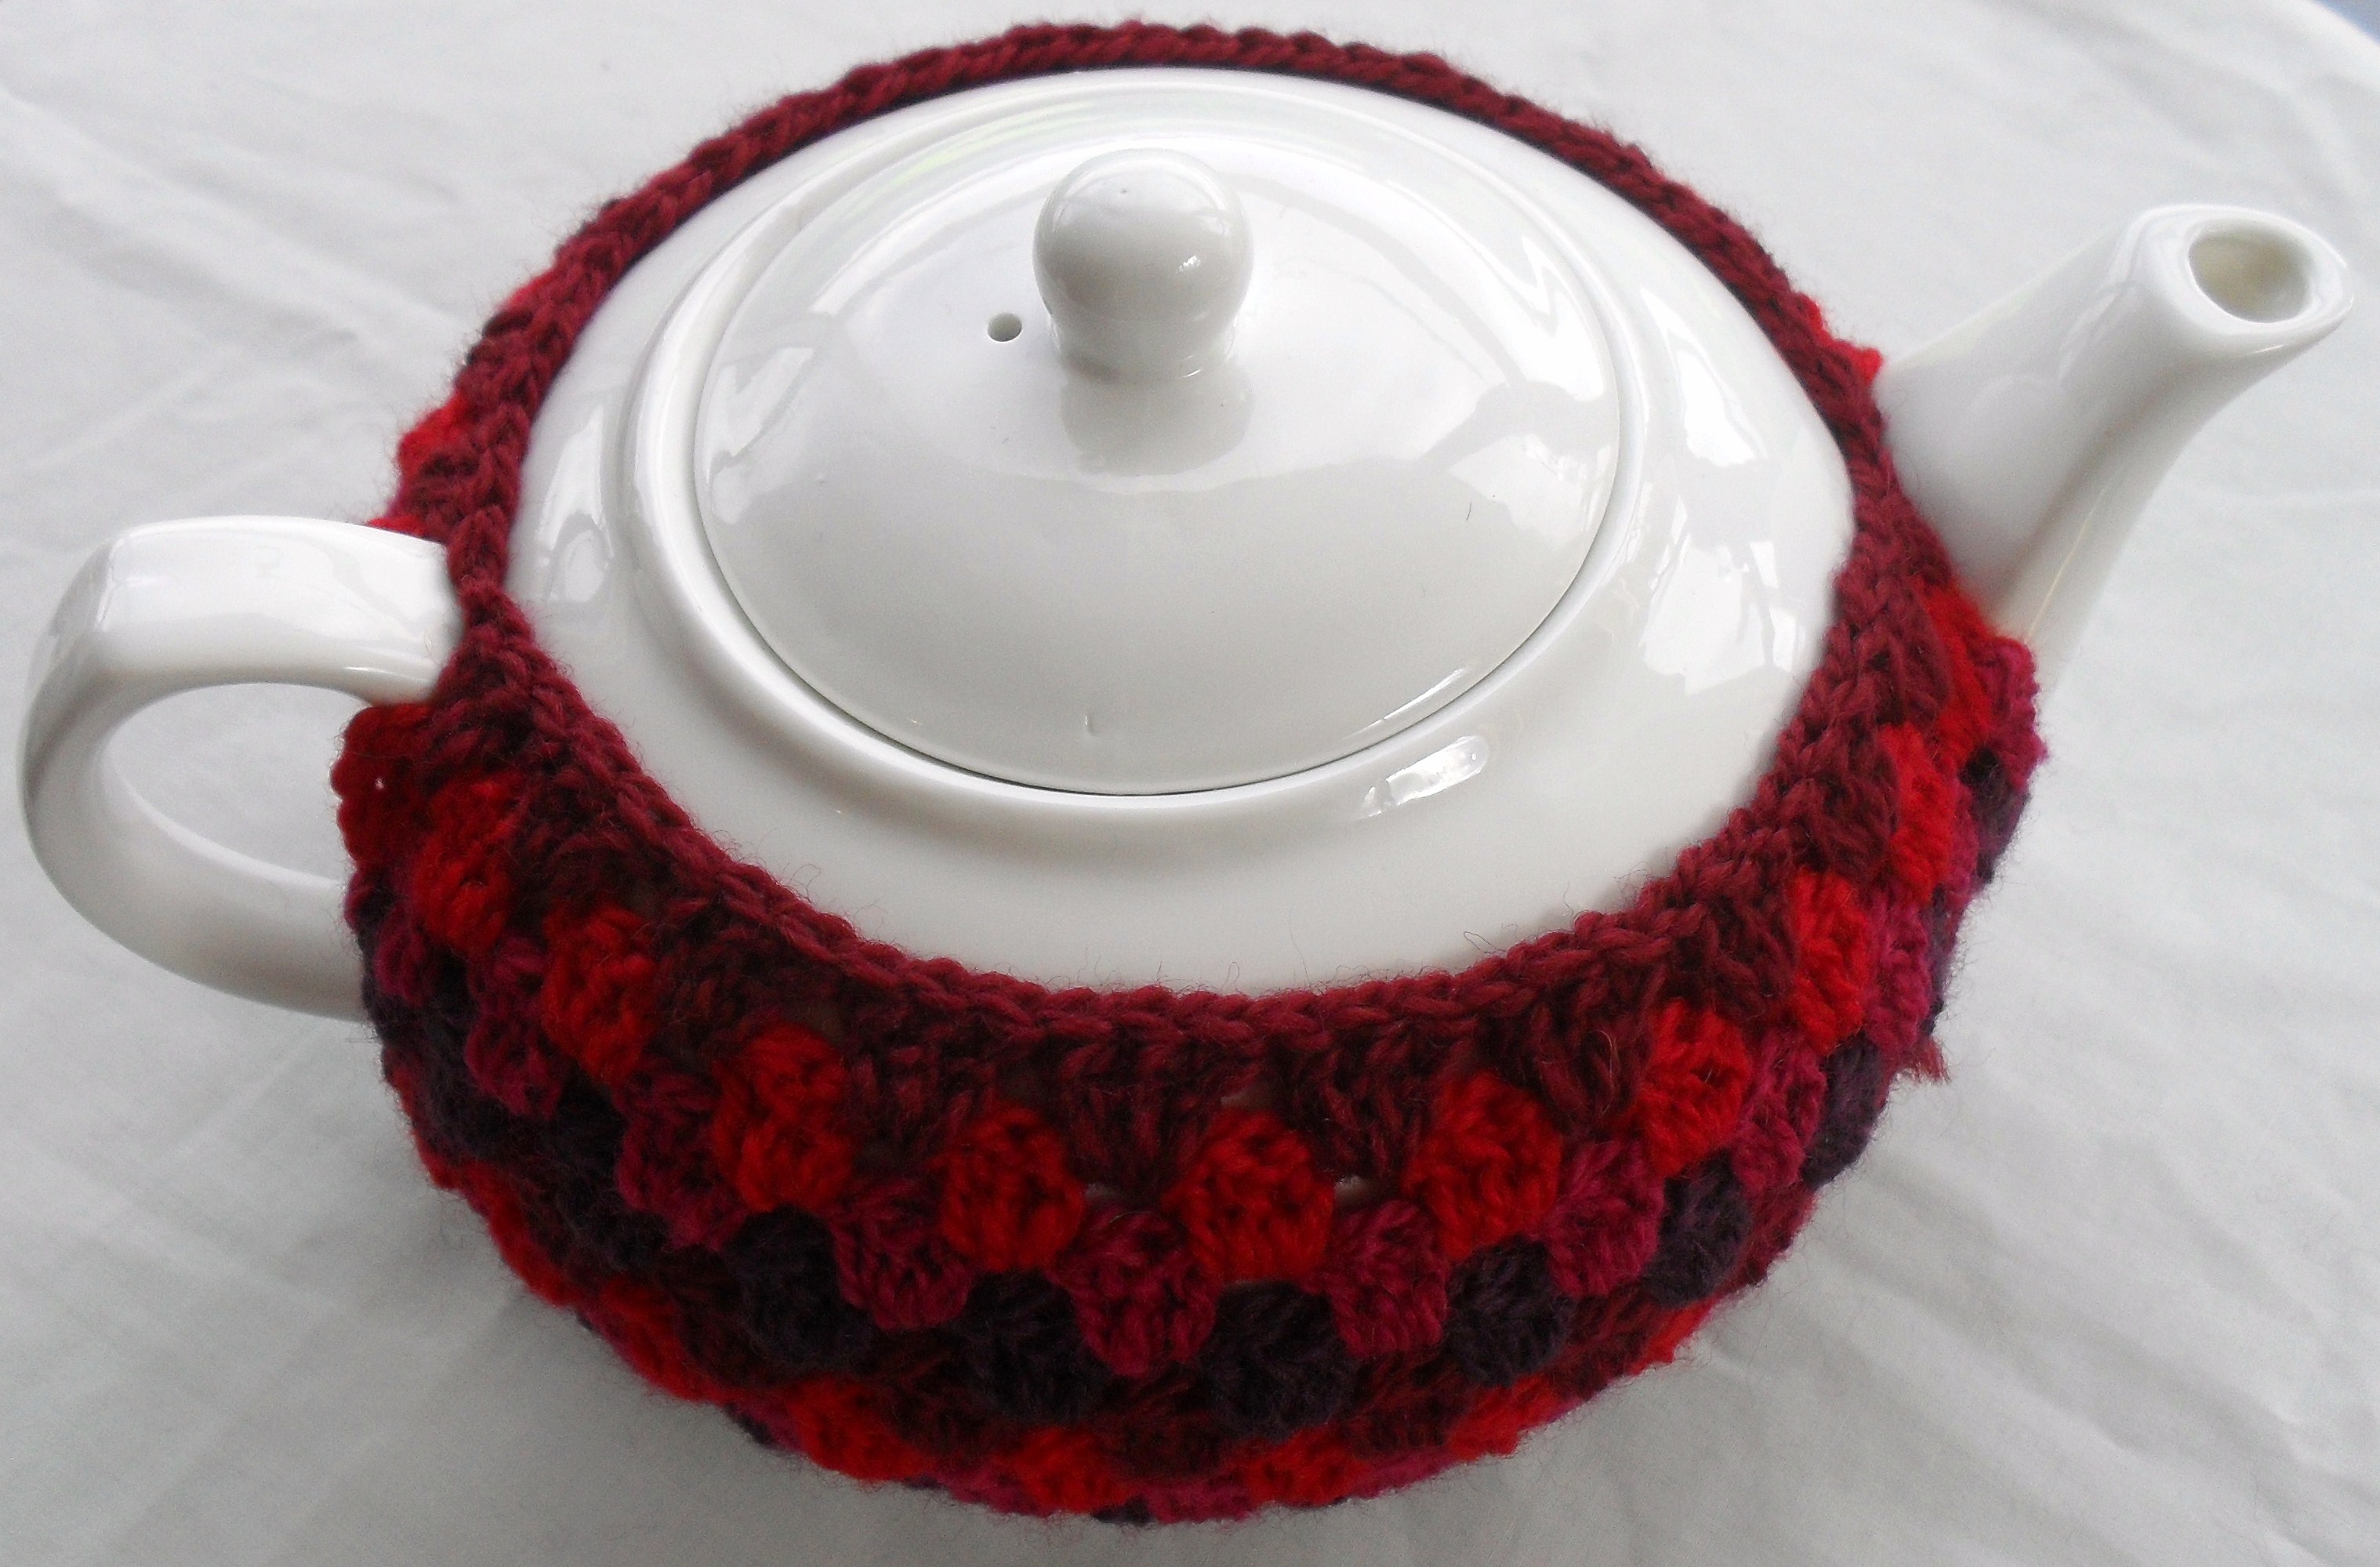
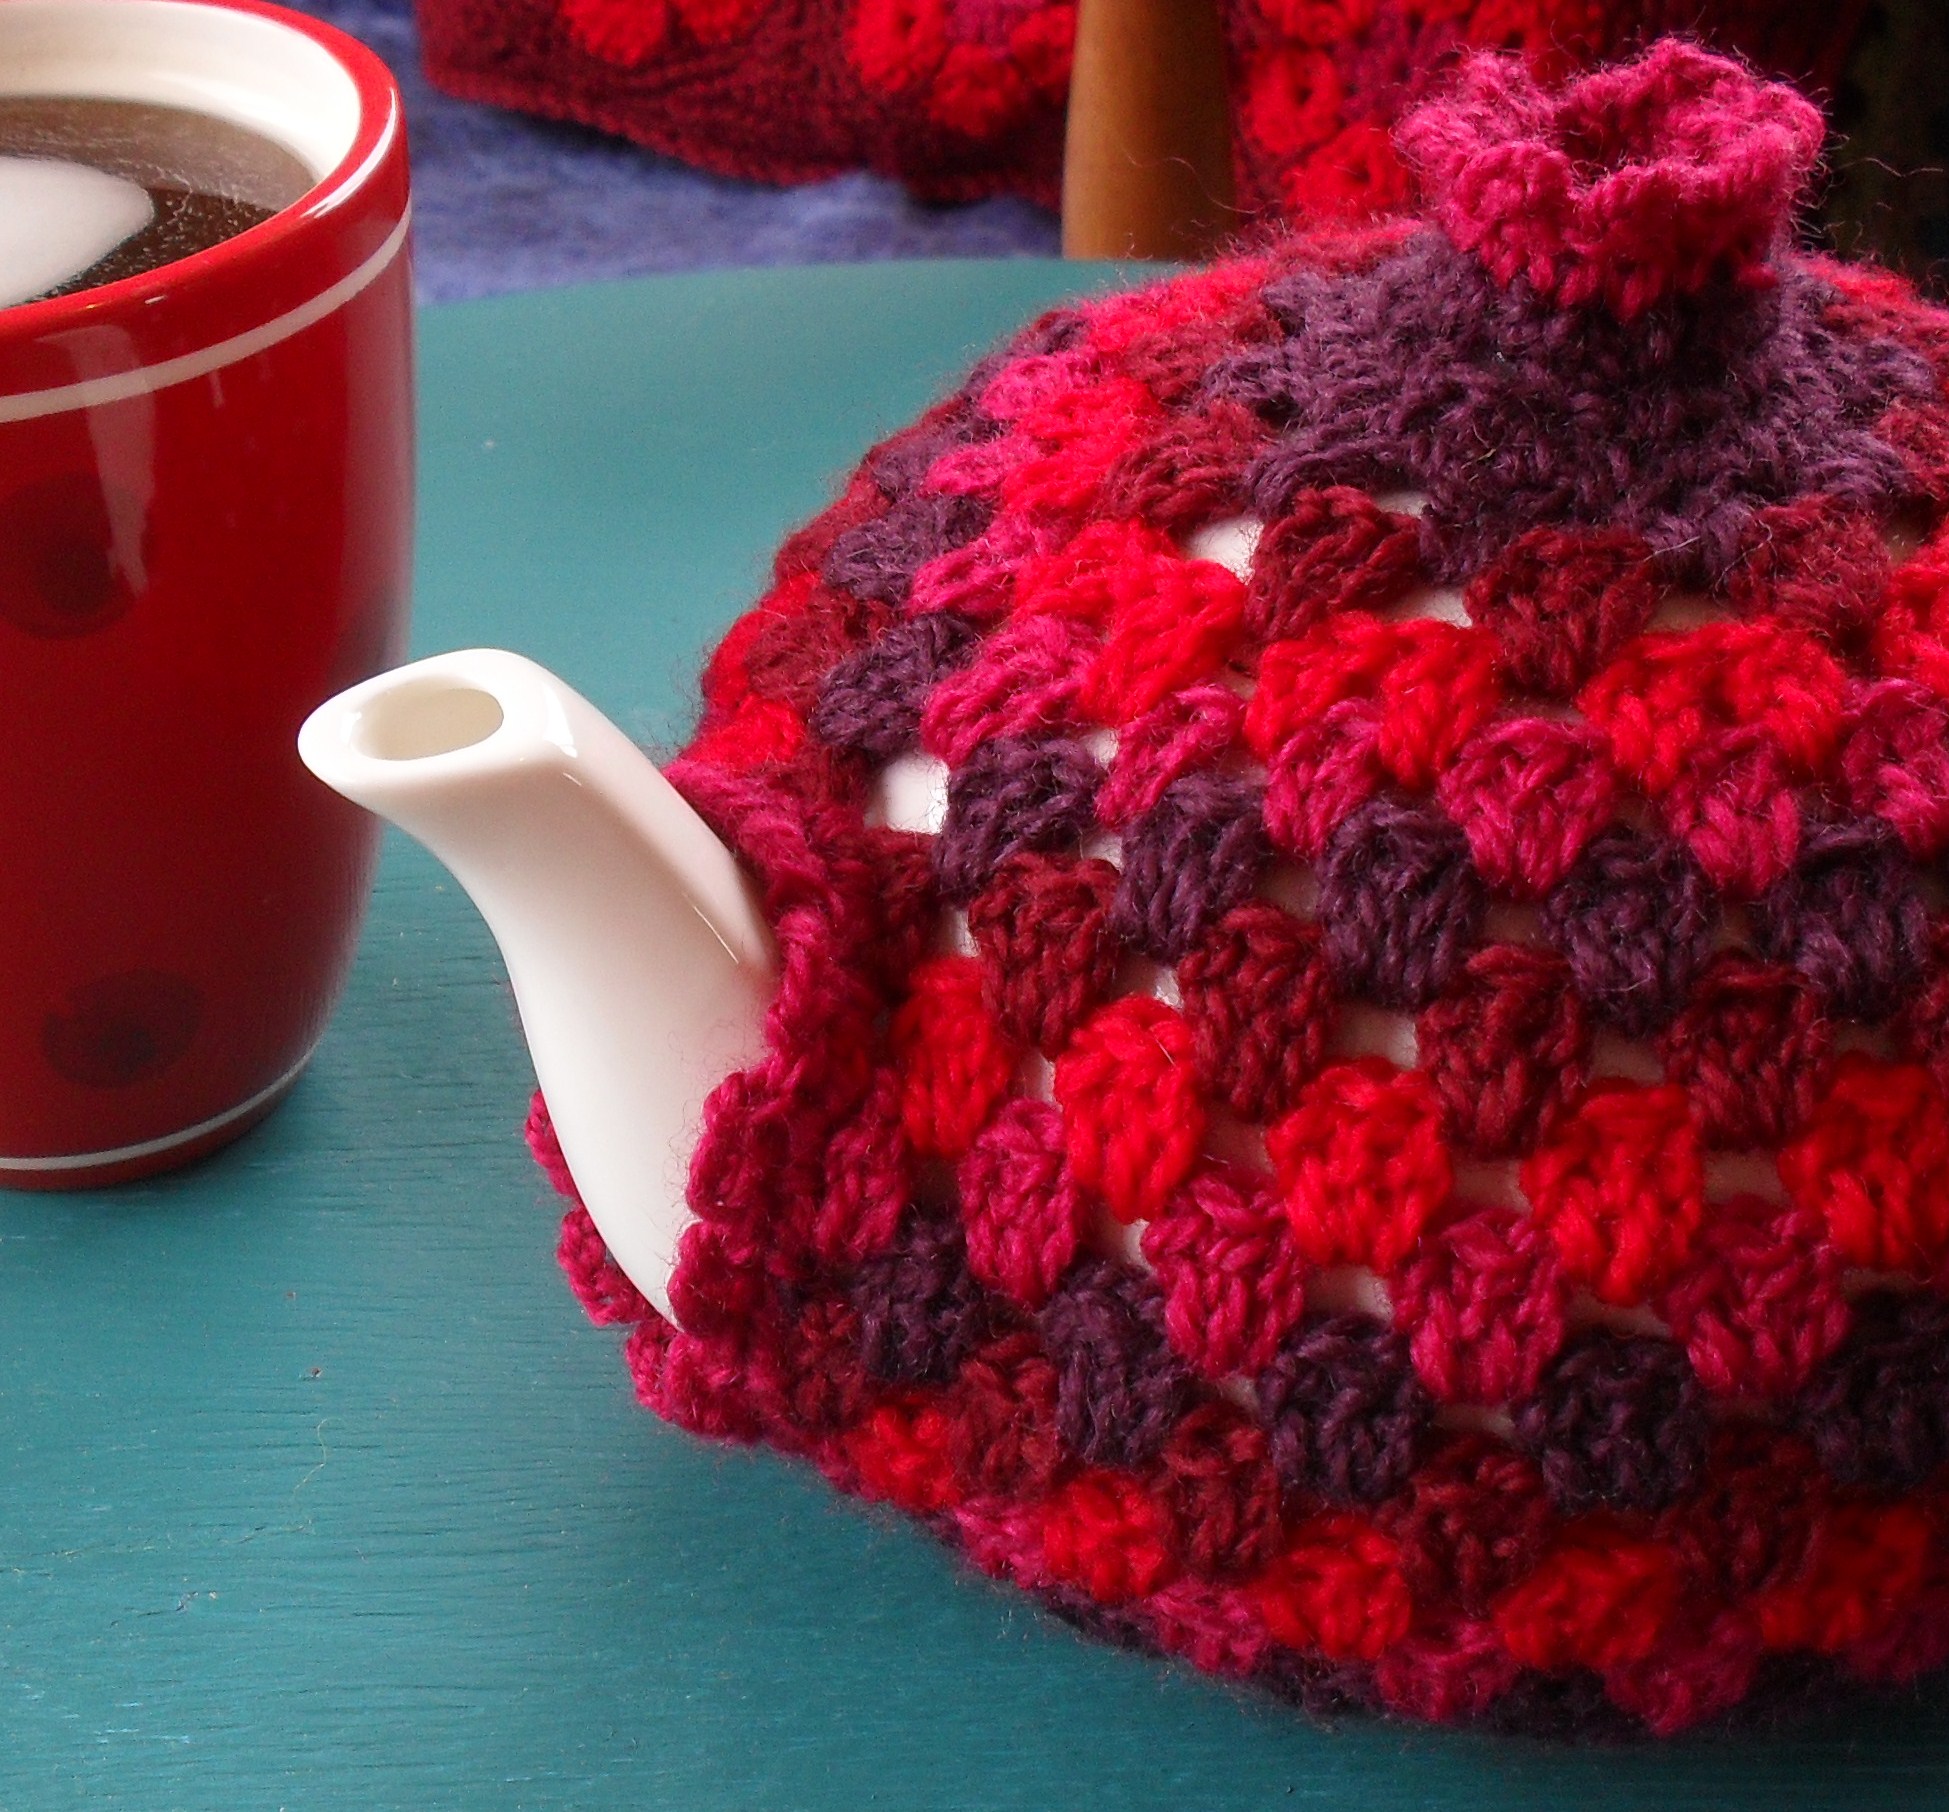
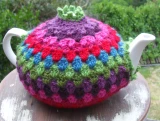
So shall we get on with it? Firstly, I used a 4mm hook and 8ply wool…. and here is my little warning, this cozy will not fit every tea pot, so please adjust the pattern accordingly to fit yours! If yours is taller, add a row or two before increasing at the top, if it is wider, make the original chain longer etc etc… If you get stuck, please leave me a comment and I will TRY to assist! My tea pot measures 11cms from base to top (not including little knobby bit at the top) and 17cms from side to side. Lots of people said they had the exact tea pot and I’m not surprised, I bought it from one of those cheap homeware places, so they’re probably everywhere which is just great pattern-wise!!! ($20… bargain!)
This pattern is a mixture of the Granny Mandala and the Granny stripe which is just such a handy pattern isn’t it! A big *thank you* to the lovely Lucy from Attic24 fame for providing such a handy pattern for us all to use! However, for this pattern, you will see that the new rows need to begin between the first and second dc of the 3dc clusters, to make it more compact…. I’ll show you that in the pictures.
Also, if you usually join your new colour like I used to, until just recently (!) with a lovely big knot, it is important in the pattern to join invisibly so the big knots don’t ruin the whole effect… to do this, bring the new colour through stitch and join with a slip stitch, then continue with instructions and fasten later by weaving in the end with a needle…. if anyone would like photographic instructions on how to do this, as I may have just confused you, let me know!
OK, less words, more pattern.
Foundation Row: Ch 72. sc into 2nd chain from hook, sc to end of row. Turn. Ch3, skip the first two stitches and make 3dc into the next stitch. *skip 2 stitches, 3dc into next stitch* repeat ** until end of row, 1dc into last stitch in foundation chain. Fasten off.
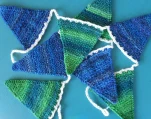
Row Two: Fold the piece in half and find the centre point. Join new colour into the space either side of the centre point, between the dc clusters of the first row using slst and ch3 (counts as 1dc) 2dc into the same space, 3dc into each of the next spaces along the row until the end, 1dc into the end space. Fasten off. Repeat on the other side.
(Phew, I’m glad I took pictures to follow because I was confusing myself there!!!)
The intention, as you will have gathered, is to make a piece of granny stripe with a gap in the middle which is where the spout will sit!
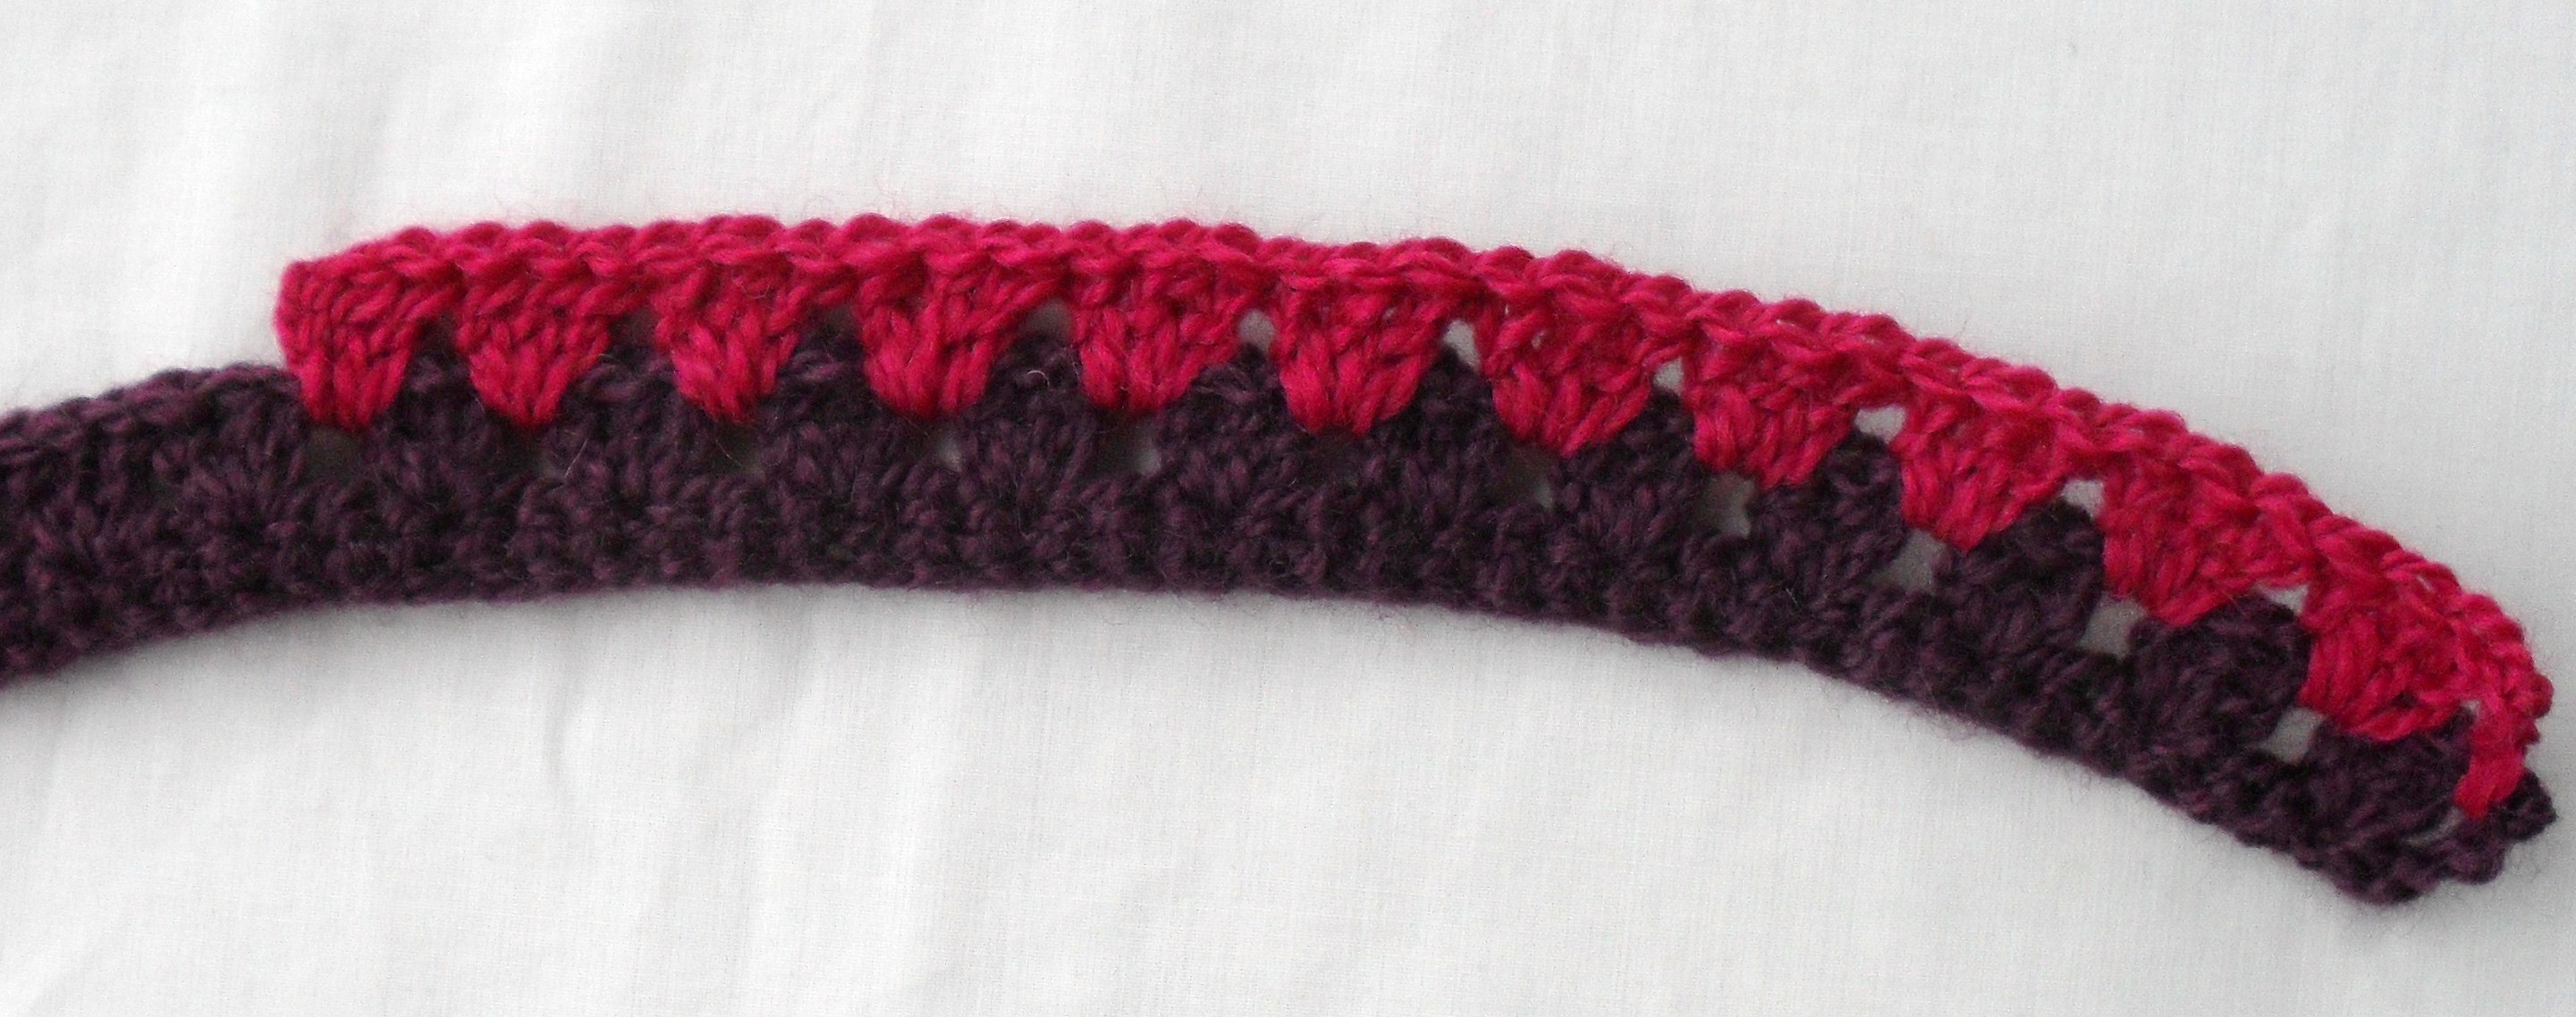
Now, carry on with these instructions until you have reached the top of the spout and handle. My tea pot needed seven rows in total, including the foundation row… have a good look at this next picture which shows you these seven rows, you will see that each alternating row begins with a 3dc cluster, and the ones between begin with a chain space. This is important because we want to keep the edges straight instead of veering off into a slope!
So you’re joining the new rows between the dc’s there… it looks a bit unfinished at this stage, but don’t forget we will be edging all of the edges with some pretty, yet charmingly discrete frills! (I’m so excited right now, I hope you’re loving making this… I can’t wait to see your results!)
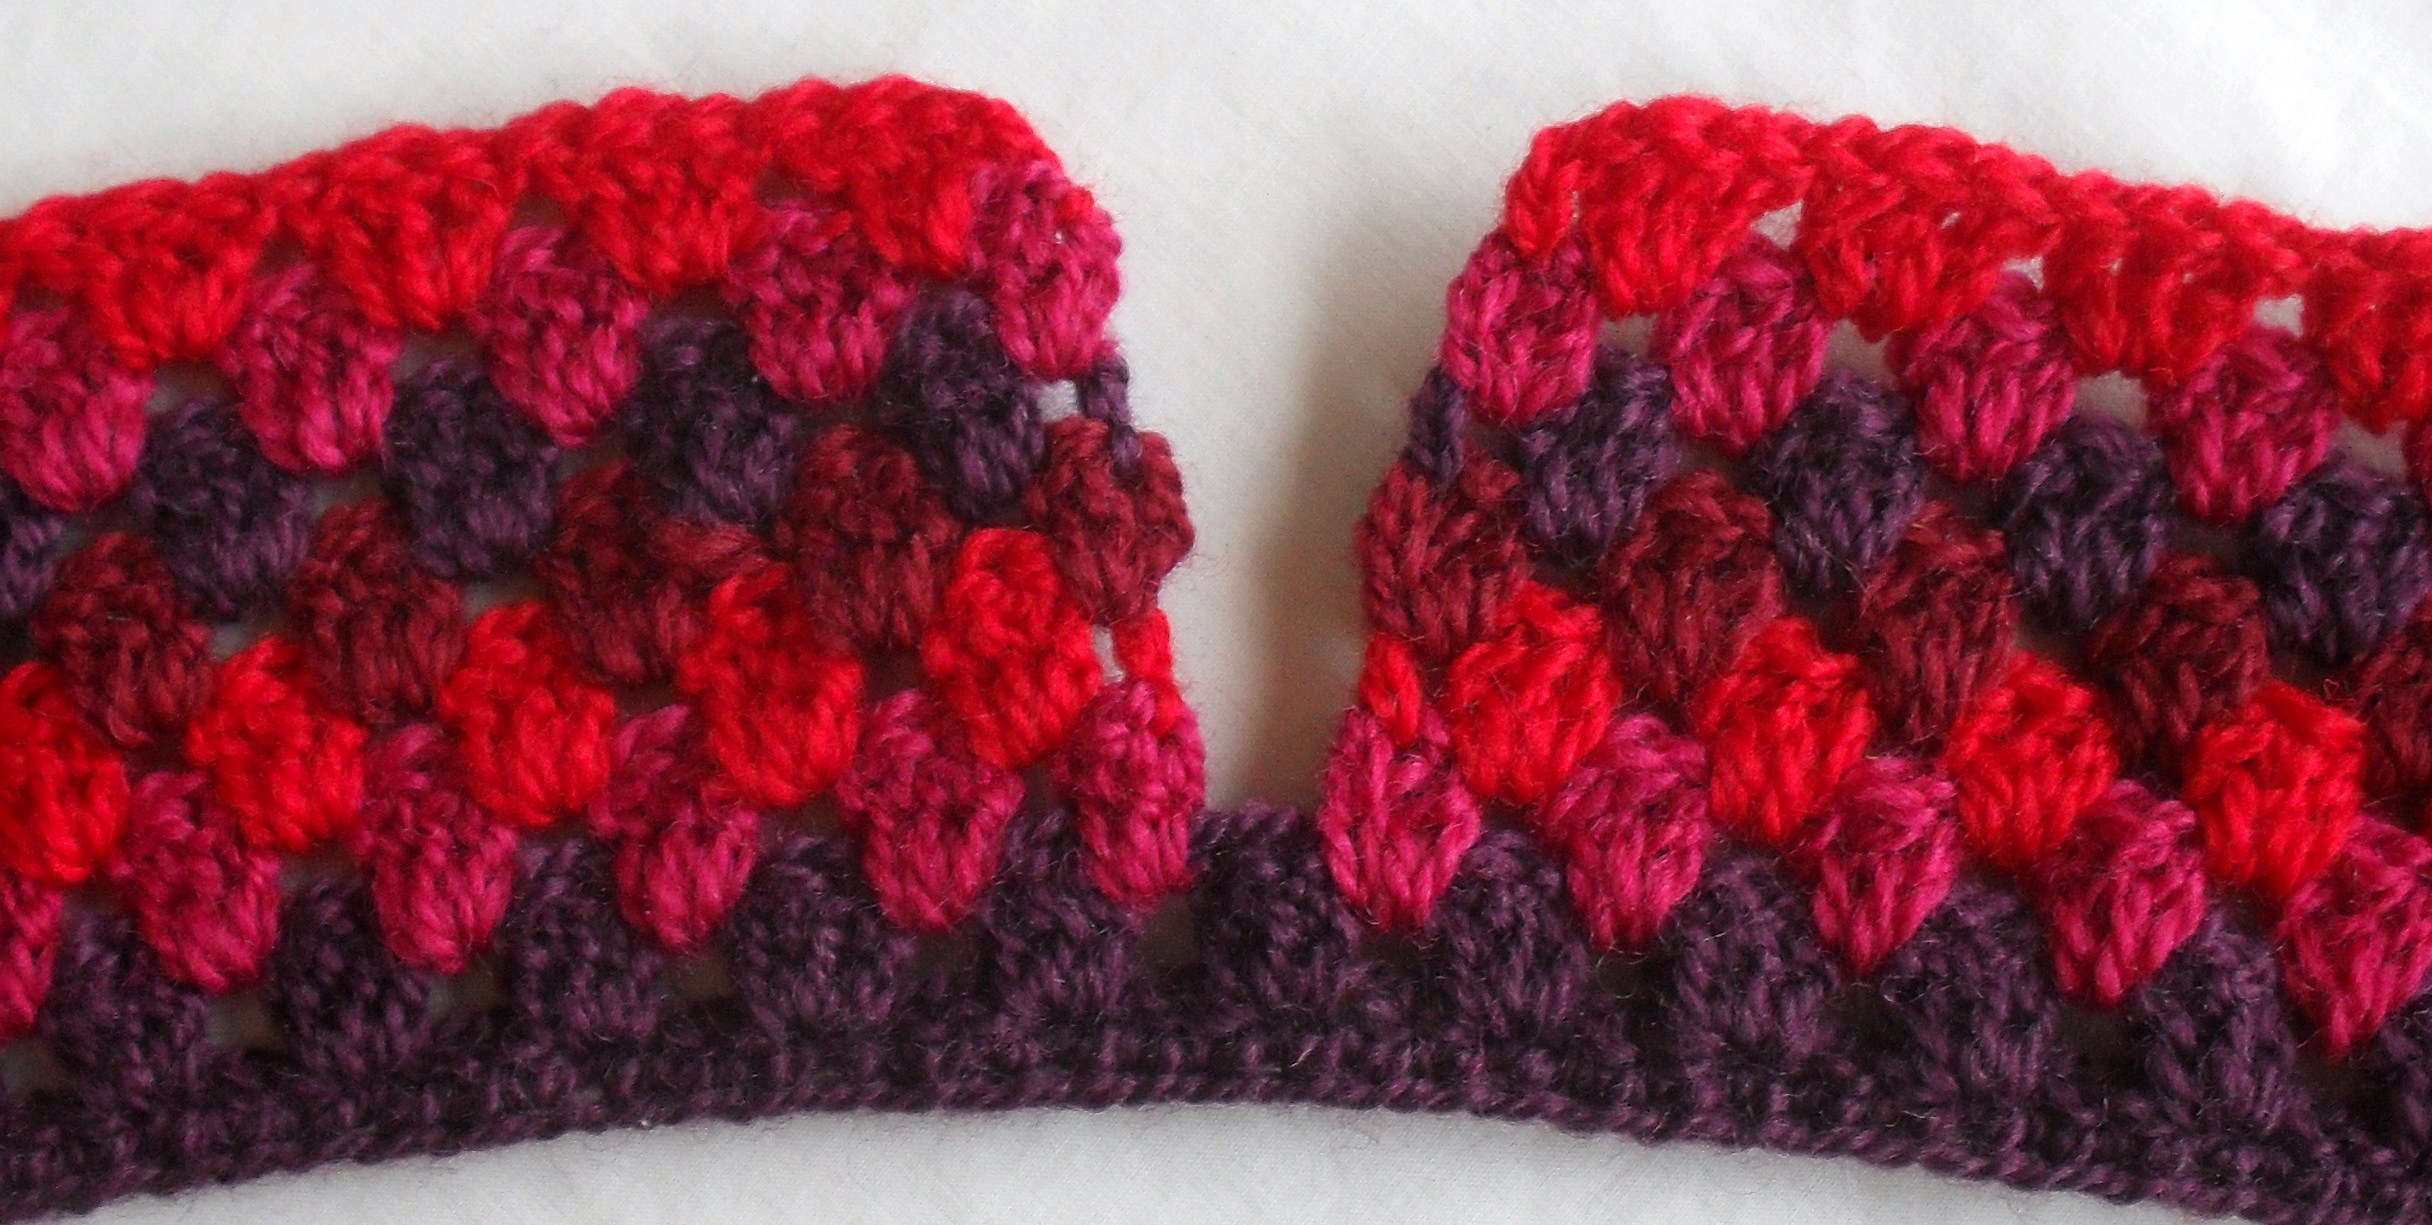
Joining the sides: OK, so when you have reached the top of the spout and are ready to join the sides to make a circle, join the next colour with a slst in the gap closest to the edge, ch3 (counts as 1dc) and make 2dc into the same space, 3dc into each space until you reach the spout edge. Into the very edge gap, make 2dc, then join the two by making 2dc into the very edge space on the other side. Make sure you make this nice and tight, and don’t have a big saggy stitch in between these two 2dc’s. Carry on around the row making the 3dc clusters until you reach the other edge, join the two edge 3dc clusters with a slst into the 3rd ch of original 3ch and fasten off.
JOINED!
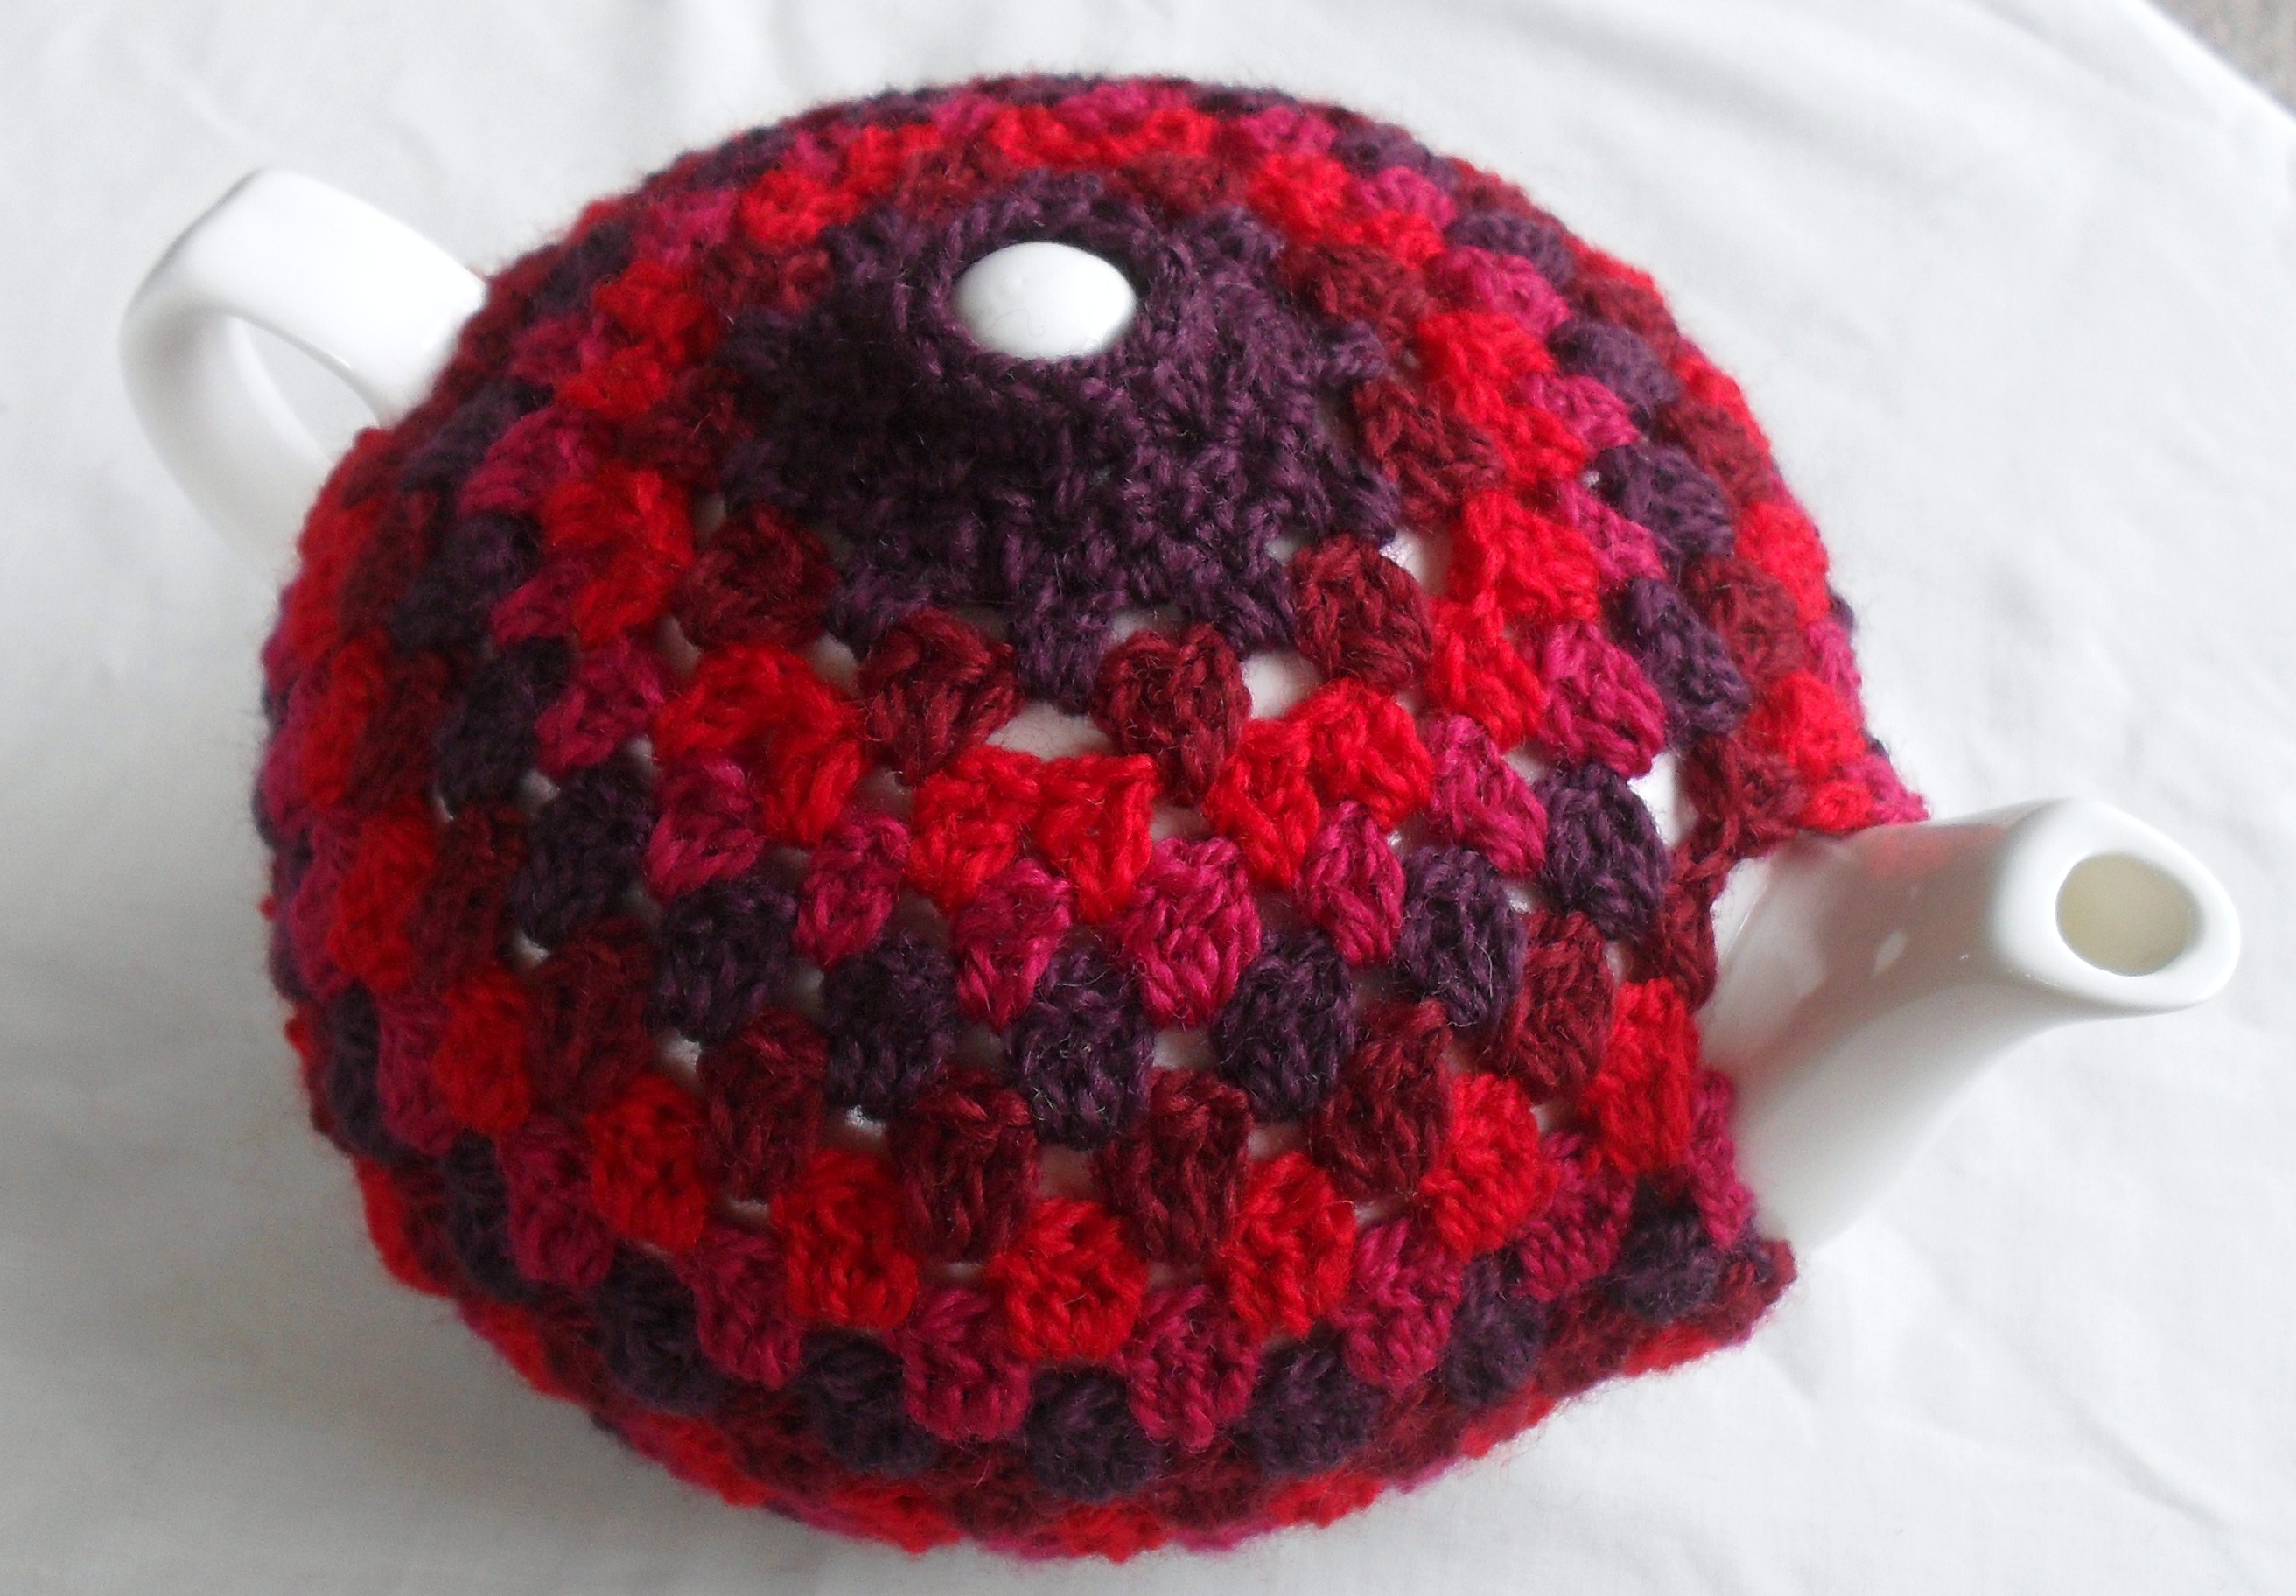
Decreasing: So if you have a tea pot like mine, the decrease will be quite important here, if yours is taller and not so flat on the top, just carry on making the 3dc clusters into each space until you need to decrease. For the next row, join the next colour with a slst and make 3dc clusters right around the row, in each space EXCEPT the spaces where you joined the spout and handle edge, just leave them empty. At end of row, join with a slst.
Next row, join new colour, we are decreasing a lot in this row, so once again, please ensure that you are making these stitches nice and tight and that the spaces between the dc’s are tight and not floppy and loose! OK, so you’ve joined the next colour, ch3 (counts as 1dc) 2dc into same space, into the next space, make 2dc, into the next space 2dc, into the next space 3dc. Repeat sequence of 3dc, 2dc, 2dc until end of row, join with a slst.
Next row, join new colour with a slst, ch3 (counts as 1dc) 1dc into same space, into each space make 2dc until end of round, join with a slst.
Next row, join new colour with a slst, make 3dc cluster into every SECOND space until end of the row, join with a slst.
Next row, join new colour with a slst, make 2dc into every space until end of round, join with a slst. Do not fasten off. You are now going to shape the area around the knob, so ch1, 1hdc into each stitch until and of round, join with a slst. Ch1, make 1hdc into every second stitch from previous round, (decreasing here) join with a slst. Ch1, 2hdc into 1st stitch, 1hdc into next, 2 into next, 2 into next, repeat until end of round and join with a slst. Fasten off.
And there we have it! Finished, all we need to do now is the edging! From beginning to end, this took me about two hours including pattern writing and photographing the process, so it’s not a huge task.
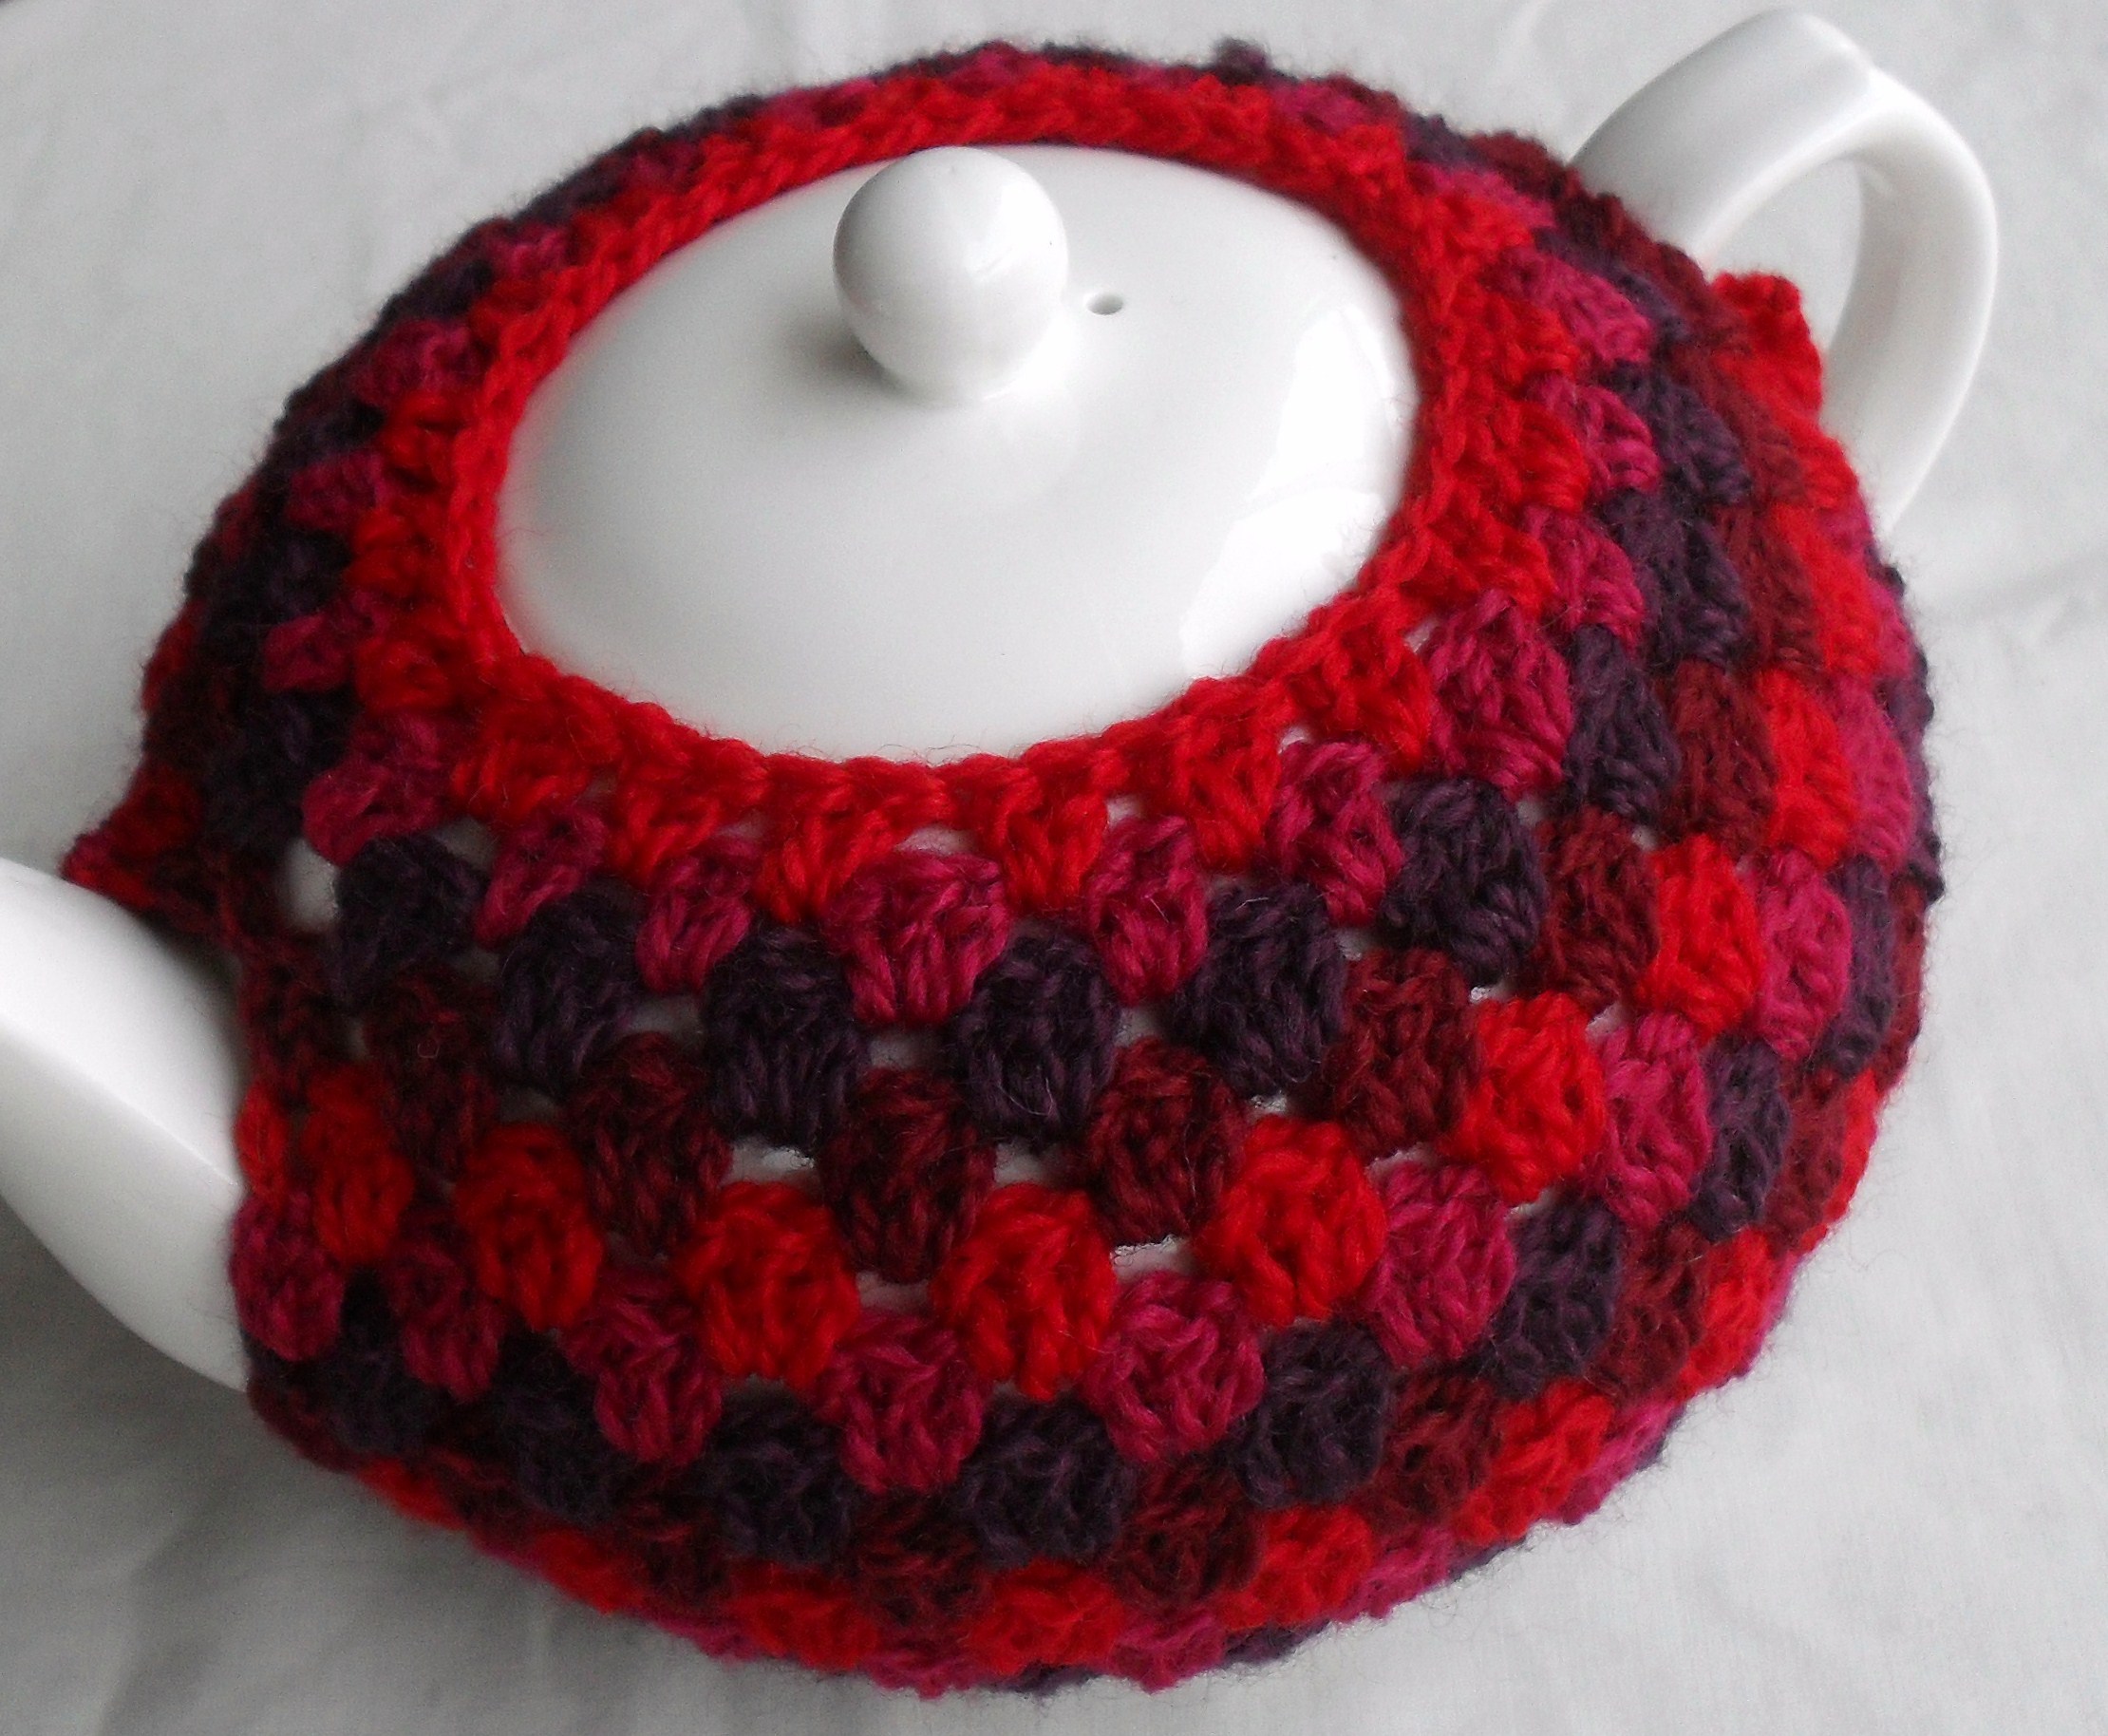
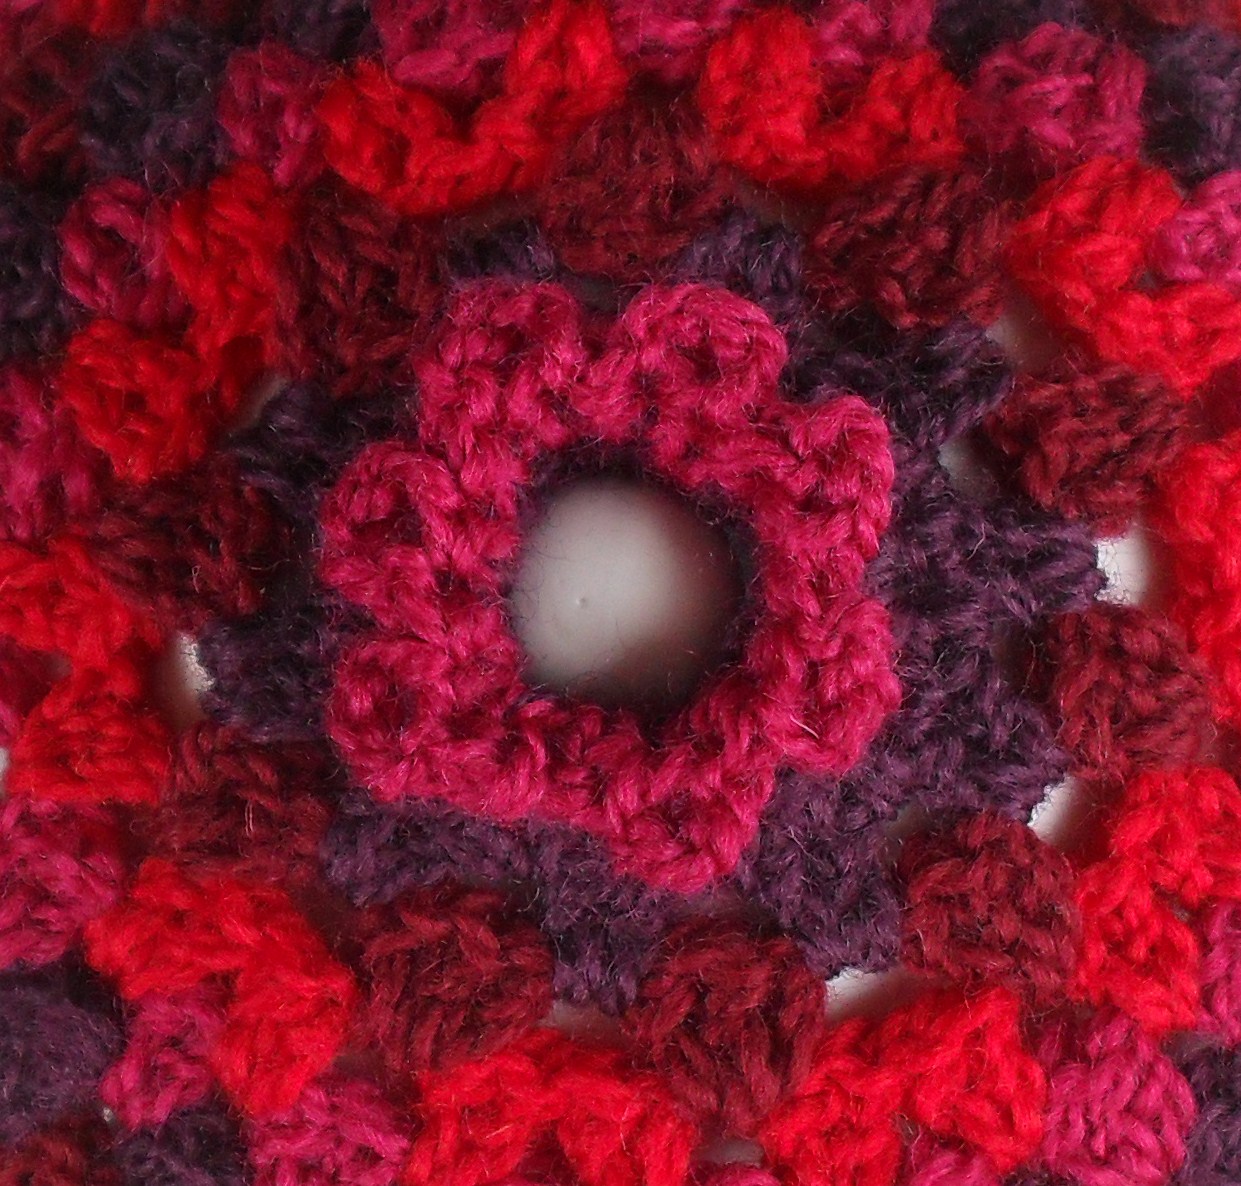
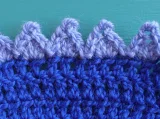
OK, so let’s prettify it and make it nice and professional looking! Shall we begin with the very top? I got a couple of comments saying the first one looked like it was wearing a crown, it did a bit! So choose which edging you want to use, for the first, I used a picot edge, and for this one I used ch and slst… so join the top colour with a slst, ch1 and sc into each stitch. Join with a slst at end of round. Ch3, into next 2 stitches make a slst, ch3 into next 2 stitches make a slst… continue around… this is cute! It looks like a frilly flower!
So it’s up to you how you want to do that… remember the carnival edging I gave instructions for? That might look cool and very crown-like!
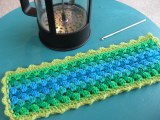
Now for the bottom… For both of the cozies I’ve made, I did a nice big scallop edging, so grab your foundation colour and attach with a slst to one of the ends, skip 2 stitches and make 5dc into the next stitch, skip 2 stitches and make a slst into the next, skip 2 stitches and make 5dc into next stitch and carry on until the very end. Now slst around the corner of the work until you reach the edge of the 3dc cluster in the foundation colour, and make 12 chain loop (or longer depending how big or small your gap is between the two pieces when your tea pot is wearing it’s cozy) to make a button hole. Attach with a slst to same stitch.
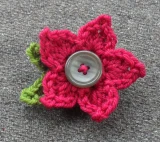
Now get yourself a nice button, I found this nice smart looking brass button in my vintage button collection….

And sew it to the other side!
I hope that photo described what I was muddling my way through before!
OK, now the edging around the spout hole and handle edge. I used the same colour as the top edging, joined with a slst then made nice even sc around the edges. As you are edging something that doesn’t have a nice clean edge, you may need to make 2sc into one stitch to make it even. Join at end of round, and to make the 3ch, slst into next 2 stitches sequence as around the top!
And a big ta-da to you!
Joyful, happy, granny goodness! I hope you enjoyed that tutorial and find it useful! I can’t wait to see more of these around the place, so don’t forget to let me know if you make one so I can come and see!!! I’ll be putting this into ravelry immediately, so hunt it down either by doing a pattern search using “Crochet with Raymond” or look up “Granny Tea Cozy.”
Right, I’m off… I’ve been at this hooking, cropping photos and posting for four hours (gasp!) so it’s about time I drag myself away from the blog world and do some real-world interaction!
Have a lovely, lovely day, sending you many happy thoughts,
Love from Alice and Raymond XXXXXXXXXXXXXXXXXXXXXXXXXXXXXXXXXXXXXXXXXXXXXXXXXXXXXXXXXX


Oh I love this one – what gorgeous colours! My naked tea pot needs one of these NOW, for it’s own dignity of course 😉 The tutorial looks super easy too. Thanks Alice 🙂
Oh you have been busy doing this tutorial within hours of posting the first pictures!
I can’t wait to have a go at this pattern. Thanks so much for sharing.
I shall let you know the results I get, Fiona xx
baaaahhaahaa is Raymond asleep standing up? Hes such a be-udiful fella.
Love the teapot cosy 😉 I likey the red ones too. very earth-mothery.
xB
That first picture looks so cozy, I just want to sit down and give Raymond a pet. Thanks for taking the time to write the tutorial. Sadly, I don’t have a teapot for a cozy. Tea is made by the cup here.
I am so glad you took the time to write the tutorial for this! I just fell in love with the cozy when you posted it… Now, how many should I make?
You’re fabulous! Thanks!
I just love your tea cozy. The colors, oh the colors, look fabulous together. The frill at the top is just too cute! Thanks ever so much for the tutorial. I can’t wait to try to make one for my cute little teapot.
How beautiful they both are, just catching up here since being offline
for a few days. I have made a plunger cover inspired by you, not as
bright as these tea cosies though, but did some tiny flowers to help.
Great tutorial as usual and one day will sit here and actually do some
instead of all the reading I do lol
Got to love raymond too ☺☺♥♥
wendy
Oh Alice, how kind and patient you are for this great tutorial! Thank you sooooooo much! It’s really really lovely! I am thinking of buying a new teapot and make this cute cozy for it (as I don’t have a teapot, too 🙂 ).
Take loads of care,
LoL, xxx
Hola. Me gustan las cosas bonitas que haces. He hecho una guirnalda siguiendo el tutorial del Mandala Prayer Flag. Así que, gracias por compartir . A kiss for Raymond .
Raymond is Star Struck!!! What a fabulous tutorial and so fast….you are the Queen!!
Thank you so much for the tutorial I am going to have to start one tonight!!!
PS Tulah is a dream kitten…such a sweetie, Raymond would love her xxxx
i love your blog, I just find it and I am so glad that I did. I am looking for a guest blogger for December and would like to offer you a spot on my blog. if you are interested please email me. mariecozycorner@hotmail.com thank you.
thank you again for sharing your beautiful work with all of us!!! thanks!!!!!
Love the cosy and would love to make one big question Alice
English crochet stitches or American? I am such a novice i have to follow a book for the stitches
Lush! and how satisfying the lovely shaping of the teapot looks to make – brilliant concise tutorial too – will definalty give it a go.xx
Gosh I am gone for a day and look what happens….two tea cosy’s, they are scrumptious. When I have some me time again I want to hook one. Oh Raymond looks like he is on guard (but asleep) here hehe. I am so ‘head down’ at the moment getting my goodies made for my stall, I am catching a min here are there to read a blog at a time when I need a 5 min rest.
Happy days xx Sandi
Ta daaa indeed! Fantastic tutorial and I LOVE the colours! Penny x
Oh WOW Alice, you really are amazing with your patterns, thank you so much for sharing, this sure beats the time needed for knitting a cosy! I feel a christmas pressie or 2 coming along xox thank you for all your time spent doing this, as ‘handmakers’ we know how much time and effort goes into making let alone doing tutorials xox
xxxxxxxxxxxxxxxxxxxxxxxxxxxxxxxxxxxxxxxxxxxxxxxxxxxxxxxxxxxxxxxxxxxxxxxxxxxxxxxxxxxxxxxxxxxxxxxxP x
Crikey lady, you are so prolific I can’t keep up!! I’d like to try that for my mum, shes been dropping hints for a while.
As your new friend, I am telling you that you really do need sleep. Without it, at some point, you will collapse. I say this with great concern, because the only way I can figure that you get all this stuff done is that you don’t sleep and that just not good for you. And besides, you’re making me tired and feel like an under achiever! 🙂
Love the newest tea cozy. Great job
Thank you Alice- it is beautiful! Looks like Raymond approves too. I’ve been missing his catty pictures lately, post more of him and of you too! You do wonderful crochet work.
I love it! The colors are fantastic.
ABSOLUTELY ADORABLE YOU ARE….and of course, what you have just so unselfishly shared to the world…who loves crochet…or just love to drink tea while enjoying their teapot’s hot outfit!!! Now, I will have to find me a plain old teapot that I could dress!!!
Immense blessings to YOU, KB and of course, Raymond!!!! With much love to that special land down under….here’s hug and kisses from the United States’ heartland….
Looking forward to your next blog!!!!
Hi Alice, me again, if you had a chance could you show a picture of where the button is placed on the side and where. Thanks if it’s not a problem. xo Robin
Seconded! I’m confused by the button placement. Is it under the handle?
lovely 🙂
Alice, you are quite simply the cleverest person I know! How do you manage it? This is simply brilliant.
Thanks for sharing…very sweet..you and the tea cozy!
l really like yr teacosy but absolutely love that cat of yrs..He looks adorable.. l like the colours you use in yr crochet as well.. Regards,
Hahnsmum,
New England,
NSW, Australia.
That Raymond is a natural photo model. I have a hairdresser who is from England and she would love that tea cozy, thanks for the pattern.
Sarah from Texas
Hello Alice!
(Sorry for my English, I wrote with the help of Mr Google!
I am fascinated by these two models TeaCrochet Cozy!
And soon I will dedicate myself to knit these beautiful projects with your tutorials!
I would like to know?
Have a photo of the back of the teapot, where the handle and where you put the button? I would love to see them
And many thanks from now
Congratulations on your work !!!!!!
Estela (from Uruguay /South America
Ohhh … Ahhh and in other news, I have more teapots that I will be posting for ooohing and ahhing over … . Your work is lovely, and I don’t even care if you are a tree hugging lesbian greenie … (wouldn’t that make a good teacosy picture …? attached to the side of a teacosy) ….
Pingback: Festive Friday #4: Crocheted Mug Cozy and Coaster | The Craft Blog
Thankyou for the hard work of preparing this tutorial.
I am a fairly new crocheter, and I MUST go and buy more wool to do this NOW
Hi Alice! I’m Gabriela from Buenos Aires,Argentina. Thank you for the tutorial. And Raymond is so beautiful, I love cats, I have 3: Brad, Chloe and Minette.
Regards and congrats!!!!!
Hi, I love the tea cosies. I am teaching myslef to crochet right now. Can you un-confuse me please? In row 2, when the first half is finished, where do I commence the 2nd half?
I love to see teacosies made in crochet and yours is particularly sweet!
Thank you so much for sharing this 🙂
Cheers
HI my name is olwyn just new to crochet i think your tea cozy is great love the colours.I am having a go did you use double knit yarn or a thicker one if i get stuck i might have to come back to you,Your other items are lovely you are a clever lady. i adore the blanket take care best whishes from Olwyn Englandx
Hi it is me again i am strugggling how do you keep the tension mine keeps going sloppy please any one help thanks olwynx
With practice, and pulling more on the string. I am 14 and have been doing crochet for at least 3 years and after a while, I got the hang of keeping the tension right. Otherwise, try a different hook maybe
Alice do you have a pattern page for the african flowers i do love them when you made them how did you jion them up sorry to be a pain speak to you soon thanks olwyn ukx
Hi Alice are you about i could do with some help mines gone wrong,love olwyn ukx
Lovely tea cozy! I’m so attracted to the jewel tones of the Granny Mandala in the sidebar though I may just have to use these colors rather than the more monochrome ones in the example.
Thank you for the tutorial! With this help I made a tea cozy myself. Will show it on my blog tomorrow! Regards from Holland, Sandra
Hi Alice!
I love the blog – your use of colour is lovely and you take great photos too. The tea cozy is very pretty – I shall have to have a go. Thanks for the inspiration!
p.s Raymond is very handsome.
Thanks so much for this tutorial. I have had a go and have made one of these myself. I put the picture up on my blog at http://makingsandmusings.wordpress.com
It’s not as good as yours, I’m afraid -I need more practise.
xx
Pingback: Again??? | Doings and Thinkings
I have a dumb question – how do you get it off the teapot?
@ Courtney: My thoughts exactly! I guess if you plan to wash the teapot, you do more of a drawstring once you get to the lid, not decreasing so the cozy fits the pot so snugly, and draw it closed to keep the tea hot & open it to get the cozy off the pot for washing.
Hey there! Found you through Ravelry. Here’s my version of your granny tea cozy:
http://theconsummateamateur.blogspot.com/2011/03/springy-tea-cozy.html
Thanks for sharing the pattern!
Pingback: Cozy! « Pond Skipping
I really enjoyed making your tea cosy! Here’s my version:
http://youcanknitwithalighsaber.blogspot.com/
Thanks so much for sharing your pattern. I love your blog!!
Hi there, Just stumbled on your site. Absolutely love your granny tea cozy and i’m going to try it straight away. I also love the knitted tea cozy with the crocheted flowers. I have that book (have lots of flowers made up and sitting in a bag) so i’m going to be brave and try the knitted cozy with the help of your tutorials and photos. Thanks so much for the fantastic site, x
Made one today 🙂 It turned out really nice, I made it with lots of different colours and difficult kinds of yarn. It is rather crazy and adorable!
…erm – that would of course be DIFFERENT kinds of yarn…it wasn’t difficult at all…(see above post) 🙂
Hi
I am from South Africa and find your work absolutely gorgeous. I am also very interested in the wool that you use. Is it freely available and is it possible to purchase it one line from SA? Also your patterns is it possible to download them? Please help as I am really interested in your work.
hello there,
my englisch is not so that from the other ladies but the teapot is great!!!!
greetings from holland
Corrie van der schoor
Hi
Your tea cozy is lovely and I was wondering if you didn’t use 8 ply wool would it still fit the teapot as snuggly?
Thanks
Cathrin
I love love love ur work. Could you PLEASE tell all of us where and what brand of yarn you use for all your projects? I can’t even begin to tell you how much I would apreciate you letting us (or me) know. I want to make several of the things that you have made. I have never learned how to put colors together the way you have and it is high time I learned. I have to go to your site several times a day because I am so drawn to the way you have blended the colors. I am very good at the actual knitting and crocheting and would love for my work to look more……….I don’t know what word I’m looking for but I put so much work into it that it should be a lot prettier than what I have available here where I live. I’m from the Midwest in the U.S. Thank you so much for your blog! It makes me day every day!!!!!!!!!!! Deborah
I’m part way through making your tea cosy, I’m really enjoying doing it and can’t wait to get it finished, my old tea cosy is fabric and terribly stained. So, thanks for this pattern, I’m a novice crocheter and knitter, your instructions are easy for me to follow.
Your instructions were clear and wonderful!. The cozy was very easy to make. I made this for my sister’s birthday in her kitchen colors and she loved it. Thank you so much for making it easy. Love your kitty, too!
Thanks for a lovely tutorial, so easy to follow, now my teapot looks fab!
Sally
xxx
ps have put a link to this tutorial on my blog – hope thats ok
Love it!
Just made one (had to adjust the pattern a bit because of a different sprout), you can see it here if you like: http://nicollie.wordpress.com/2011/08/30/granny-theepot/ 🙂
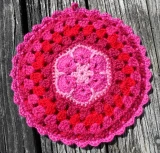
I just stumbled upon your blog and fell in love immediately! Just beginning with crochet and really find it comforting in a way! Definately gonna try your cosy but I would also like to know if there is a pattern for the cushion next to Raymond (the one with the red flower pattern – it’s beautiful!!)
You have a new “follower” in me – thank you for the inspirations!!!
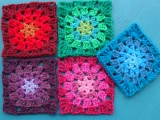
the pattern is the african flower pattern. It isa beautiful pattern and can be found on ravelry!
Hello, when i saw your colourful tea cosy i just had to make one!!!! I loved it, and after a few times i managed to make it!!! so lovely , i can´t stop looking at it. Thanks for your tutorial. I love what you do! it is wonderful .Now i can,t stop making things!! I want a cat like yours 🙂
xxx rachel
I have only just found your blog and I just love the teapot cosy!!
Bedankt voor het delen van je patroon. Je maakt veel mooie dingen. Mijn thee-pot jasje kun je vinden op mijn blog http://knutsel-mam.blogspot.com.
Groetjes Jacqueline
I just wanted to add a comment to tell you THANKS for sharing your patterns with others. I love to crochet but am not very creative when it comes to designing. So, I am very grateful when creative folks, like yourself, share your patterns for free! I looked for a tea cozy pattern and came across the perfect one on your site! I LOVE it and plan to make it soon. I was drinking my tea and it went cold in ht etea pot this morning. I thought — this i silly, I need to make a cozy! Now I can do just that! Thanks again!
Pingback: This Sunday Day « Notes from Heidi
Hello and thank you for your lovely blog! I was inspired by your tea cozy and made one for my granny! She wanted it simple, but maybe later i’ll make one with all the roses!
Here is my version: http://noran-nurkka.blogspot.com/2011/10/inspired-by-crochet-with-raymond.html
Pingback: ::Ten Tea Cosies To Make… | meetmeatmikes
Thank you for the lovely teapot cosy, it reminded me of sitting at the table pouring a welcoming cup of tea in Bidwell St Wellington way back in 1970, enjoyed your site.
Thanks to you I made a wonderfull teapot !
Making one for my granny for Christmas! fingers crossed her teapot is the same size as mine that I’m using for measurement! 🙂
I love love love this pattern. Thank you so much for sharing it. I’m more than half way through already and its great. Im relatively new to crochet and certainly not as fast as you…has certainly taken me more than 2 hours, but it shouldn’t take me more than a day. Fabulous!
It took me ages as I’m really new to crochet and RUBBISH at changing wool!! But it got finished at 2am xmas morning as a present for my granny! 🙂
Wow, superb weblog structure! How long have you been running a blog for? you make blogging glance easy. The entire glance of your website is great, let alone the content!
Pingback: BearyAnn Crafts » Blog Archive » Hot Tea
How generous of you to share your lovely patterns and techniques with us. Inspiring and intimidating at the same time! I can’t wait to make two. (Well, one for a friend and another for me! 😉
I can’t wait to try this! If I wanted to do it in a solid color instead of stripes, would I just turn the edge like normal?
I just finished making this tea cosy in the time it took my 9 month old son to take his two day naps (the housework can wait…)!!
Your instructions/picutres were super easy to follow & this project only used tiny amounts of yarn! Love it!! x
Right that’s it I am so going Op-shopping when I got to the next town over on Saturday to hunt out a teapot just so I can have the excuse to save it’s dignity with one of these!! I can already see the colours I want to do it in too. Hee. Fingers crossed I can find one now.
Hello, keen to try out your tea pot cosy. But can you let me know if the stitches you use are US or Uk.
I do apologies, I have just seen your tab of the stitches you use in your patterns. x
I really like and thank you for post.Many thanks again. Great.
I was so excited to find the tab for the tutorial on your side bar. Thank you! I had to make a few changes (to fit my teapot) but all in all I stuck to your basic pattern. Hopefully I’ll have photos to post on my blog tomorrow.
Pingback: Tuesday Talk – July 12, 2011 | Mybitsandbleeps's Blog
Well, we’ve only just “met” but I love you already! Thanks for sharing sooo many great ideas!
Very nice
Mary O
hi! i am from argentina, buenos aires city. I followed your instructions and made it!!! i´ll send you the pictures!! (besides I have 2 cats!!) Thanks! Now I´ll start a new one!
Hi!
I know this post is nearly 2 years old, but I found it recently and LOVE the pattern – so I made me one (almost to your pattern) – and chucked on some flowers – I call it “Tea in Granny’s Garden”. Come see my pics of it on my blog! 🙂 http://al-wrightbeingus.blogspot.com.au/2012/06/tea-in-grannys-garden.html thank you for all of your lovely patterns and crochet help.
Tracey
Beautiful! I am going to make this right away 🙂
You write really well.
Demolition Flower
Pingback: Crochet with Raymond’s Granny Tea Cosy | Cosy Tea Blog
Hi Alice!
I just wanted to drop by and say that we have featured your pattern on our blog today! Thank you for sharing such a lovely tea cosy pattern, and happy crocheting!
Faye x
Your tea cozy is fantastic. I love Granny squares and your blog and make is totally inspiration and shows how versitle they can be. Thank you so much for sharing. x
Made two of these for birthday gifts in no time. The receivers LOVED them! I love that they take such a short period of time with such enthusiastic results! Thank you!
Pingback: My First Tea Cozy! | Spinning Some Yarns
I love your blog!! Have just discovered it and it’s made a crappy day so much better. Just so happy to find it 🙂
This is probably the cutest of the crochet tea cozys (cozies?) I’ve seen! I cannot wait to try this!
thanks raymond you saved me from my tea cosy nightmare! i’m just about to blog about it and add a link to you as you r amazing! xxx
Pingback: Granny-chic tea cosy | littlepoppits
Hi – do you know how much wool this pattern takes? I have a 50g ball of lovely yarn that would be perfect for this project – but don’t want to run out when I’m nearly there. (I’m new to all this and don’t have a huge reserve of yarn yet).
Many thanks, and wish me luck!
sorry I don’t know. I am not a proper pattern designer, I just share my designs to the best of my ability
Just found you today! I’ve wanted to make tea cozies for years….and can’t wait to try your pattern. I love it! How kind of you to go to so much effort in sharing your patterns.
Hello,
I love to crochet and I am always making something new…but I have taught myself how to crochet through watching videos and learning from people which is a problem when I want to make something new and the only way to make it is to read a pattern. I have tried to teach myself how to read crochet patterns but either my brain is too old or just plain stubborn. I hate to ask/bother you but do you think you could make a step-by-step video??? If you could I would really appreciate it, I really want to make this adorable tea cozy!! Please help!!
sorry that is beyond my technical capabilities!
Pretty! 😀 thanks! your tutorials are very useful!:)
Greta that you showed the button. I’ve thougt about how to get it off for so long… 🙂
Thanks for that hint!
Pingback: Crochet Tea Cosy « humbugshouse
Pingback: Crocheted Tea Cosy | Amanda Makes
Eeek, I just made one, thanks for the tutorial!
Pingback: Mandalicious | stitchandbitchamman
Please help? I need to increase. How do I do that?
Pingback: Clown’s Pants | hopkalop
Thank you kindly. I, making my Christmas presents and I sure the married kids are going to love Mummas (Granny). Tea pot cosy. ………
Is there any possible way you could do a video tutorial for this?
Huzzah! well explained pattern – this is only my third creation
Thank you for the lesson! I changed mine up a bit. but for this beginning crochet artist, your directions were very helpful!! see the photo of mine here: https://www.facebook.com/photo.php?fbid=10202654275895695&set=a.3546830227068.2162669.1161921037&type=1&theater ….or if that didn’t work: https://www.facebook.com/heatherivy
Pingback: Care for a Cuppa Crochet? 10 Free Tea Cozy Patterns!
Pingback: 4 Free Crochet Tea Cozy Patterns DIY Projects | UsefulDIY.com
Pingback: 20 Free Tea Cosy Knitting Patterns | Knitting Women
Where does the button go. Does it go below the handle, or do you need 2 (one for bottom and one for top of handle)?
When you said it was 17cm from side to side, is that measuring the whole way around the fat part of the pot or from spout to handle
Pingback: This Sunday Day | Notes from Heidi
This was a beautifull and simple pattern. I have adapted it as my teapot is really one of those borosil plungers. It has turned out beautifully. Where can I send you a picture?
Can I sell something I made with one of your patterns if I provide the link? Thanks! I love all your granny-square projects!
Thanks for the great pattern. I just found it on Pinterest. Maybe one day I will start to work on it, have enough teapots to cover.
Best regards from Berlin
Pingback: Crafting time is ‘Me’ time! | Our Crafty World
I am new to making tea cozy’s. I looked all over for a pattern that worked and I had no luck. I was just about to give up when I came across this one. This is by far the best teapot cozy pattern I have found. It works up beautifully and the possibilities are endless. Thank you for the amazing pattern.
Thank you for the free pattern, you’re a french community of Knit and crochet